
- on Sun 17 April 2016
Tags: DIY
If you are an avid reader of my blog you will know a few things about me at this point. First, I like to make things, secondly, I am interested in security, and thirdly, I probably watched too many spy movies and too much sci-fi when I was growing up. All of these are important to understanding my latest project build: the high "security" Internet button.
Some events need a certain "weight" to them. As far as technology goes, this is one of the few things filmmakers consistently get right. Imagine watching Alien (classic 1979 sci-fi) if Ripley could have enabled and disabled the Nostromo's self-destruct with a few simple keystrokes, or if Jean-Luc Picard (Star Trek) could just poke a few buttons to re-route power to shields instead of having to leverage the expertise of hisextensive engineering crew. The stories simply wouldn't be the same if technology was always user friendly in movies.
Some things have an importance about them that means they should be difficult. While this is easy to find in industrial processes, its rare to see this on, say, email or Facebook. These systems are easy by default and lack a way to add ceremony to the occasion. For this purpose I built the high "security" Internet button.
An example might help here. In 6 to 8 months I hope to be defending my thesis. This will probably be the most important "test" of my life so far, and will be fraught with deep personal importance. After the defense I will want to post to Twitter and Facebook about the outcome. While I could simply do so from my phone, imagine this: I could, today, give my adviser the key to my high "security" Internet button. After the defense, if I succeed, he returns the key and I use it to activate my machine and post my success to the world. I could just post about it on my phone, but given the option, I will use the machine any day.
The high "security" Internet button is, at its core, a button that can be configured to perform any given task on the Internet.
The thing that makes my Internet button different from all the Internet buttons available in the world, is that the high "security" Internet button needs a key to operation.
Without the key, my button won't do anything, with the key, however, you can select one of three settings (allowing for different possible button actions).
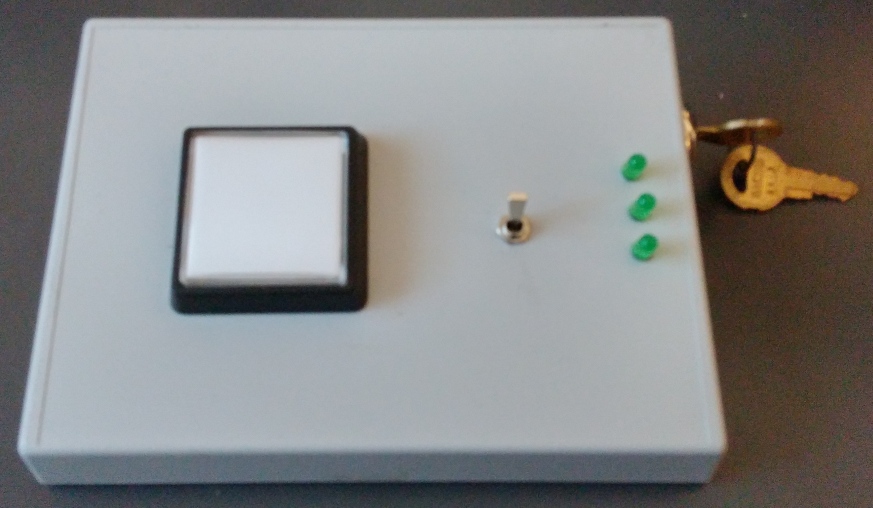
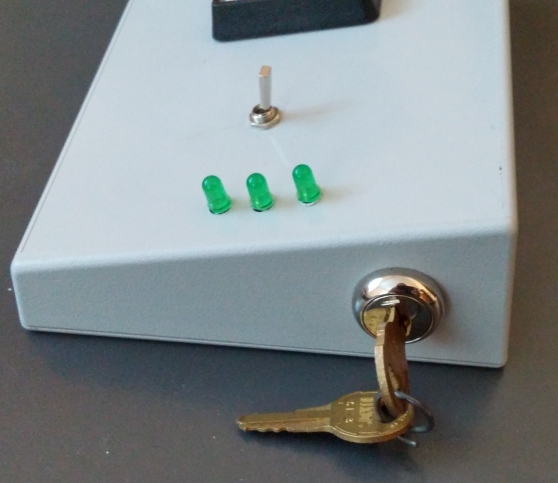
When you turn the button on, using the central toggle, It first connects to the Internet. While this does take several seconds, there is no harm in leaving the device online, especially if it is plugged in (as opposed to running on battery). While it does this only the red power LED is lit. Once the Internet connects the three selector LEDs will glow dimly. At this point you must enter the key and turn to one of the three key positions. Each position is associated with one of the three LEDs which glow fully when that key position has been reached. When a mode is selected the large button will glow red indicating that the button is ready to go. You then simply press the button (and hold it for a brief second to show it that you are very serious) and button press will be sent to the cloud to serve its fell purpose. As this happens the LEDs all turn on, noting to the user that the button has been activated, and forcing you to adjust he key to activate it again, preventing double posts.
The build
The base of the build is a standard project box that I got off the shelf at ax-man (A really cool local surplus store). The box is remarkable only for its generic gray boxy-ness. While this may be an issue with some projects I feel that it is just about right for this one, as it makes the end project more about what the thing can do, not what it looks like. Also, its genericness means I could leave it out on my desk if I wanted too without it being too distracting. At any rate it's the only box I had, so it was the best box for the job.
I ended up hand cutting holes for the switches and lights using the awl on my multitool. It's a strange tool for the job, as most people would rather use a drill or a dremel. I probably could have done it a lot faster with my dremel, but my two-bedroom apartment doesn't really have a good place for making that kind of a mess. Looking forward to future projects I would love to find space to develop my power tool abilities.
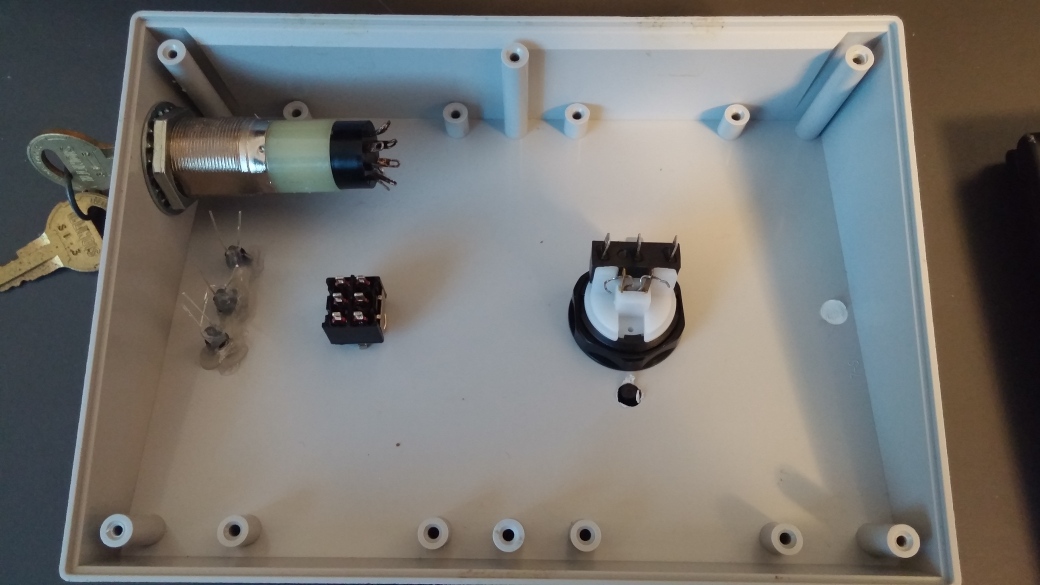
All of the switches and LEDs are relatively standard and are from Ax-man. The main button has a replacement LED in it, since the original wasn't working at the voltage levels I chose for the project. Past that, the only interesting part was the key switch which (unfortunately) came without instructions.
To figure out how to wire the switch I decided to do some science, I hooked each of the eight terminals up to a different pin on an arduino. Then for each pin, set that pin to ground and all other pins to input with the internal pullup. By checking which pins read low I could see which pins were connected to the ground pin. By doing this for all pairs I could map out the behavior of the switch at each key value, and from there design a wiring layout to get me a nice three wire interface, one common ground, and two wires that encode 0-3 (the four possible key values) in binary.
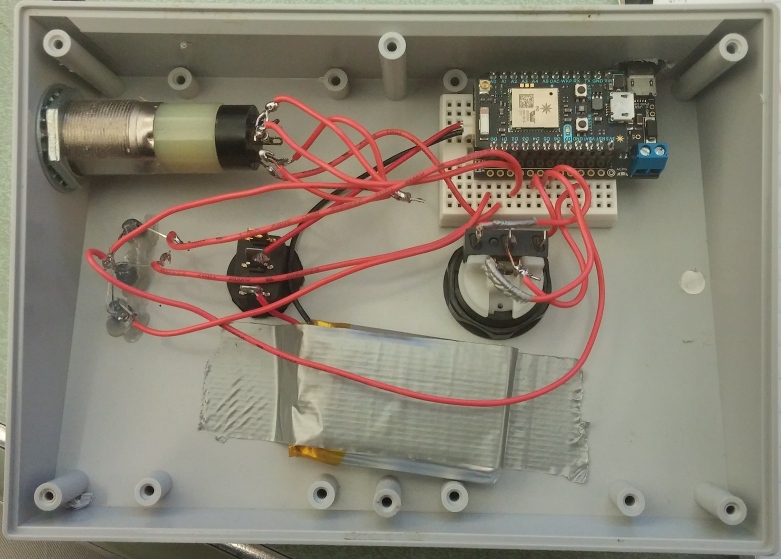
While the wiring image makes the wiring look complicated it really isn't. Power runs from a rechargeable battery, through the on-off switch, into the particle photon board I'm using as a brain for the device The key switch, LEDs, and button all are connected to the board, with some of their ground wires merged along the way. Not shown in these pictures (as I added later) is a red LED attached at the on-off as a simple "power on" notification. The other LEDs do not light up immediately after being turned on, therefore I felt some feedback on the power button was necessary.
For brains, I am using a particle photon, which is a simple easy to use Internet of things board. I am also using the particle photon power add--on which gives me both a battery charging circuit and a switch circuit that lets me charge or run on battery power without opening the case to switch over the plug. The code is pretty simple and just fires an event to the particle cloud which can be connected to the IFTTT service without much trouble. After that I can use IFTTT's service to dispatch the event to any of a large collection of online services. I was originally going to use an attiny85 with an esp8266 (which would have resulted in a lot more complicated wiring) but I coudn't make the boards work together, so I eventually broke down and payed for the more all-in-one solution.
reflections
There are two outstanding issues I have with this build. The first is a practical issue, the button will occasionally not start. When the button has been off for several days it will sometimes fail to start connecting to the Internet or running my code when I first turn it on. I can normally fix this by turning it off and on again. I can notice this due to very low levels of power given to the LEDs while the photon connects to the Internet. In that way, this issue isn't terribly inconvenient, however, it is problematic as I don't know why it happens.
The other issue is a little more fundamental. I designed this device with three main goals: big glowing button, connects to the Internet, and key-switch security. This leaves usability and practicality around priority four or five. I find I don't actually have much use for an internet of things button day to day. Likewise, this button is, perhaps deliberately, more complicated than is really needed to accomplish the task. All of this is fine for this project, but I think I might want to make one of my next projects somewhat more user-friendly.
One final note I want to make about the high "security" internet button is that it isn't actually secure. While it is true that you need the key to work the button under normal circumstances, there are several ways to get around this if you are willing to tamper with the device. The most obvious way to bypass the key is to pick the lock. I don't have much faith in the lock for being very pick resistant. After that, however, the case for the button is not secure at all. It can be easily unscrewed or cut open with hand tools. Once inside the box anyone could re-wire it to bypass the lock entirely. I suppose both of these attacks would require some technical expertise as not everyone can pick a lock, and not everyone would know how to rewire the device to bypass the lock. In that way the key probably does give a basic level of security, but the actual goal is more to give the feeling of security than actual security.
As always if you want more information feel free to contact me over twitter or email.